Customizing the Image Icon Menu
Introduction
You can customize the icon menu by:
- Changing the location of an icon in an existing icon menu page
- Replacing an icon with a different icon in an existing icon menu page
- Renaming an existing icon page
- Creating a new icon page and then adding the icons that are most useful to you
|
Note: |
|
Steps
- Right-click an image to display the image context menu.
- Select Icon Menu.
- Optional:
- Click the drop-down icon menu list.
- Right-click an icon menu name. Synapse displays a sub menu.
- Do any of the following:
If you want to do this...
Choose this option...
Create a new page that does not contain any icons.
- Select Create New.
- Synapse create a new icon page that you can add icons to.
Make a copy of an existing icon menu page.
- Select Make a Copy.
Rename an existing icon menu page.
- Select Rename.
- Enter the new name in the Rename dialog box.
- Click OK.
Move an icon menu page up in the drop-down list.
- Select Move Up.
Move an icon menu page down in the drop-down list.
- Select Move Down.
Delete an icon menu page.
- Select Delete.
- Click Yes to permanently delete an icon menu page.
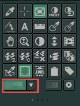
- Right-click an icon to select that icon for editing. A yellow border around the icon indicates that this icon can be edited.
- Select an option in the list menu to replace the icon you chose to edit.
- To exit editing mode, click outside the icon menu or submenu. The icon menu closes.
Results
Icon menu customizations persist across your Synapse work (login) sessions.
Additional Options
Press the ESC key on your keyboard to exit edit mode.
To access the other pages in the icon menu, do any of the following:
- Use your mouse to scroll backward to go to the next icon page or scroll forward to go to the previous icon page.
- Use the drop-down menu option to change
to a different icon page:
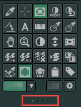
- Click the page indicator to select a different
icon page:
Related Topics
Viewer Context Menu and Icon Menu Options